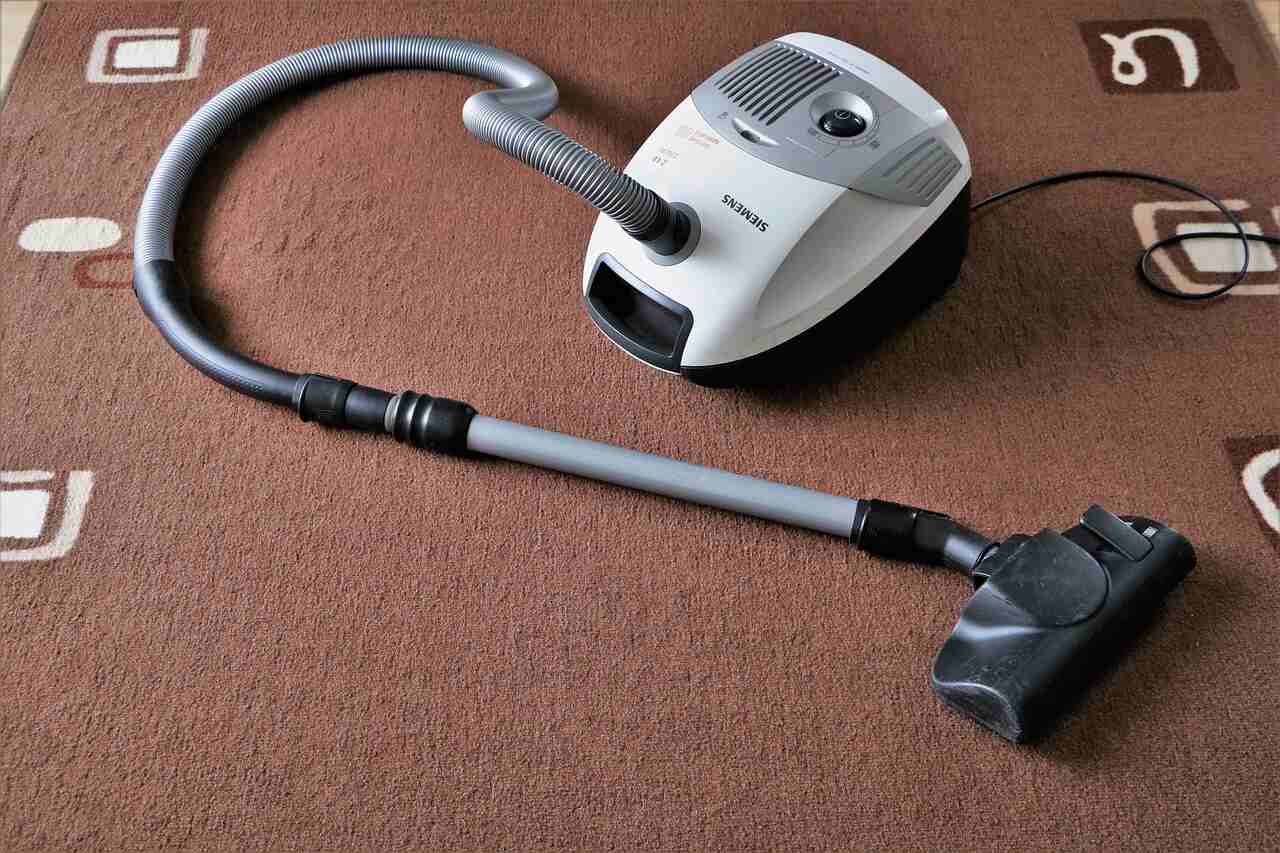
Is your vacuum cleaner not turning on? The problem might be a damaged or cut power cord. Don’t worry, you’re not alone. Many people throw away perfectly good vacuum cleaners just because of a broken cord, not realizing it’s something they can fix themselves.
Learning how to replace a vacuum cleaner cord is easier than you might think. You don’t need to be an expert or have advanced tools. With a little patience and the right guidance, you can fix it at home and save money on costly repairs or buying a new unit.
In this article, we’ll show you a step-by-step method to safely replace the cord on your vacuum cleaner. The process is simple, beginner-friendly, and uses tools that most people already have at home. We’ll also share some smart safety tips to help you avoid mistakes and get the job done right.
Whether your cord is frayed, completely cut, or just worn out, this guide will help you fix it and get your vacuum cleaner running again. Not only will this repair extend the life of your appliance, but it’s also a small way to reduce electronic waste.
Let’s get started and bring your vacuum back to life—without spending a fortune or calling a technician!
Table of Contents
Signs Your Vacuum Cord Needs Replacing
- Cracked or Cut Cord: If you see cuts or cracks, it’s time for a new cord. Damaged cords are not safe.
- Loose Plug Connection: Does your plug fall out easily? That’s a clear warning sign.
- Power Loss While Cleaning: If your vacuum stops often, the cord may be the issue.
- Burning Smell or Sparks: A bad cord can cause sparks or smell. This is a fire risk.
- Cord Gets Hot: A hot cord means something’s wrong. Replace it soon.
Vacuum Cleaner Power Cord Repair Process:

1. Ensure Safety
Before you begin fixing a cut vacuum cord, stop and think about safety. Working with electricity can be risky if you’re not careful. One small mistake may cause a shock or fire.
First, unplug the vacuum cleaner from the switch. This step is very important. Never work on any cord while the appliance is still plugged in.
Next, make sure the area is dry. Water and electricity do not mix. If your hands are wet, dry them first. Also, remove any metal jewelry like rings or watches.
Use tools with insulated handles to protect yourself. These are designed to protect against an electric shock in case of a mistake. If you don’t have them, it’s better to wait than to take a risk.
Handle wires carefully. Don’t rush. Go slow and check each step. If the wires are old or burnt, replace them instead of trying to fix them.
It’s also a good idea to wear safety gloves. They give you extra grip and protect your skin from cuts or burns.
Always double-check that the power is off before you touch any wires. Taking the time to stay safe is always worth it. Power cord safety is not just a tip — it’s a must.
2. Tools You’ll Need
- Screwdriver – for opening cases or loosening screws.
- Wire cutter – to trim or strip wires.
- New power cord or plug – Needed if you’re replacing one.
- Insulating tape – for safely wrapping exposed wires or insulation.
- Multimeter – essential for testing continuity and checking if the repair is successful and safe.
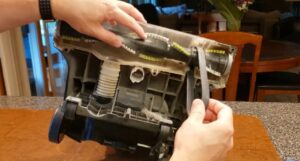
3. Remove the Plug & Cut the Damaged Cord

At this point, unplug the plug. Lay the cord out flat and look for cuts, burns, or fraying. These are signs of damage. Carefully cut off the damaged part of the wire. Be sure to leave enough clean wire to work with when adding the new plug. Throw away the damaged section so it’s not reused by mistake.
4. Connect the New Plug

Now it’s time to attach the new plug. Open it and look inside. You will see three small slots for the wires. The brown wire goes to live, blue to neutral, and green-yellow to ground.
Push each wire into the right place and tighten the screws. Make sure the wires are secure and do not move. A loose wire can stop the vacuum from working or even cause a spark.
Take your time and double-check everything. This step is simple but very important. If your kit came with labels, follow them for extra help.
Once the wires are in and tight, close the plug cover. Your power cord is now ready for testing.
5. Test with a Multimeter
Before using your vacuum again, it’s smart to test the cord with a multimeter. This tool checks if electricity can flow through the wire. First, plug the probes into the meter and set it to continuity mode. Then, touch each probe to the two ends of the cord. If the meter beeps or shows a number, the wire is fine. No sound or number? There may still be a break inside.
This quick step can save your vacuum from more damage. It also helps you stay safe by spotting hidden problems. Multimeters are cheap and easy to use, even for beginners.
Common Mistakes to Avoid
Replacing a vacuum cleaner power cord might look simple, but small mistakes can cause big problems. Here are a few things to watch out for:
- Using the Wrong Power Cord: Always use the right type and length of replacement power cord for your vacuum. A cord that doesn’t match can cause your vacuum cleaner to stop working or create an electrical issue.
- Wiring the Vacuum Incorrectly: Double-check how the wires connect. Make sure the hot, neutral, and ground wires are in the correct spots. A wrong connection can damage the motor or even create a fire hazard.
- Leaving Wires Loose or Uncovered: Use wire connectors or strong electrical tape to cover all wire joins. Loose or exposed wires are not only unsafe but can also lead to your vacuum losing power while in use.
Why You Can Do It Yourself
Fixing a vacuum cord may seem hard at first, but it’s not. With clear steps and a bit of time, most people can do it at home. You don’t need to be an expert or have special tools. Many vacuums are built in a way that makes vacuum cord replacement easy. As long as you follow safety tips, you can get it done. Fixing it yourself also saves money. Instead of asking, how much does it cost to replace a vacuum cord, you’ll already have the answer — much less if you do it on your own.
Best of all, this small job builds your confidence. You’ll feel great knowing you handled it yourself.
Why You Can Trust This Guide
This guide makes things simple and is written based on real experience, not on assumptions. It’s written in simple words so anyone can follow along—even if you’ve never fixed a vacuum cleaner before. We’ve tested each step to make sure it’s safe, easy, and effective. Our goal is to help you fix your vacuum cord at home without stress. You don’t need to be an expert or buy special tools. Plus, by learning this skill, you’re not just saving money—you’re cutting down on waste and building confidence in DIY repair. Trust this guide to get the job done right the first time.
Warnings & Caution:
- If you’re not fully confident, consider calling a professional technician.
- Do not ignore signs of burning, melting, or sparks on the plug or cord.
FAQ
Can a vacuum cord be repaired?
Yes, a vacuum cord can be repaired if the damage is minor, like a cut or fray. With the right tools and safety steps, you can splice or replace the damaged section at home.
How do you put a new plug on a cord?
To put a new plug on a cord, strip the outer insulation to expose the wires, connect each wire (live, neutral, and ground) to the correct terminals inside the plug, tighten the screws, and close the plug securely.
Is it better to repair or replace a vacuum?
If the problem is simple, such as a damaged cord, it’s best to repair the vacuum. This saves money and reduces waste. But if the motor is damaged or the repair cost is more than a new unit, it may be wise to replace it.
How much does it cost to replace a vacuum cord?
The cost to replace a vacuum cord is usually low. If you do it yourself, it can cost between $5 to $20. A new power cord may cost around $10, and basic tools like a screwdriver or wire cutter are often already in your home. If you buy a vacuum cord repair kit, it may cost $15 to $25.
However, if you take it to a repair shop, the cost could be $50 to $100 or more, including labor. Doing it yourself is a budget-friendly option that saves money and extends your vacuum’s life.
Final Thought
Now you know how to replace a vacuum cleaner cord. It’s not hard. You don’t need to be an expert. With a few tools and clear steps, you can do it yourself. This fix works for most vacuum models. A broken cord doesn’t mean you need a new machine. You may not even need a full vacuum cord repair kit.
In many cases, a plug and a screwdriver are enough. We also showed you how to test the cord using a multimeter. This simple tool helps you check if the job was done right. If your cord retractor is stuck, some of these tips may help with that, too.
A damaged power cord can make your vacuum stop working. But now, instead of searching for vacuum cord repair near me or asking how much it costs to replace a vacuum cord, you can fix it on your own. This guide was made to be easy. It puts safety first and uses simple words. Try it once, you’ll save money, avoid waste, and feel proud you did it yourself.

Welcome to Homenias, I’m Jaman M, and I’m here to help you discover the best home products. With years of experience, they offer genuine reviews and helpful guides. Their mission is to make your choices easier. It’s organizing your space or finding creative solutions. Explore how the right products can enhance your everyday life. Don’t miss out on finding the best home products to raise your living experience.