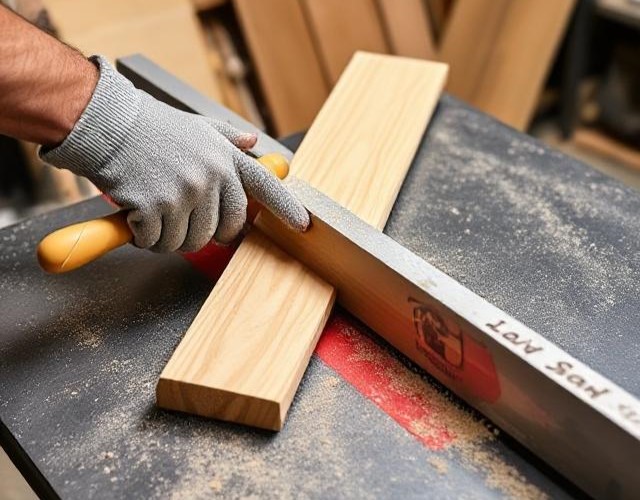
Introduction
Accuracy is the heart of woodworking. Even a tiny error—like 1/16 inch—can make a drawer stick or a cabinet door hang unevenly. Joints may not fit at all. A table saw is one of the most versatile woodworking tools available, capable of delivering straight, clean, and repeatable cuts. But accuracy doesn’t come automatically; it requires proper setup, precise measurement, the right blade, and consistent technique.
Many beginners struggle with learning how to cut accurately on a table saw, not because the tool is weak, but because they don’t fully understand how to maximize its potential. This guide walks you through every detail you need to know to cut accurately: setup, blade selection, fence alignment, measuring and marking, different types of cuts, safety, troubleshooting, common mistakes, and pro-level tips.
By the end, you’ll have the confidence to make professional-quality cuts and projects.
Table of Contents
Preparing Your Table Saw for Accuracy
Before making any cuts, your table saw must be properly set up. Improper setup is the main reason beginners fail to achieve precise cuts.
Blade Alignment
- Check that the blade is parallel to both the miter slot and the rip fence.
- Misalignment—even slight—will cause angled or rough cuts.
- Use a dial indicator for precise measurement. For a simpler approach, a feeler gauge can also help.
- Recheck alignment periodically, especially after changing the blade or moving the saw.
Fence Check
- A loose or crooked fence ruins accuracy.
- Always lock the fence tightly before each cut.
- Make sure the fence is perfectly parallel to the blade.
- For beginners, marking the fence alignment with a permanent marker can serve as a quick visual check.
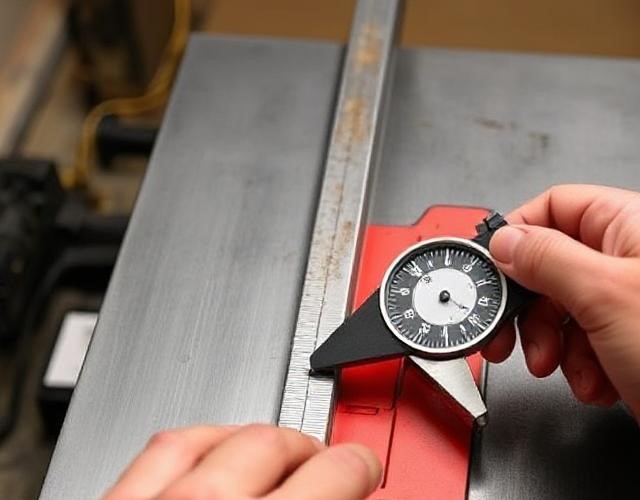
Calibrating the Rip Fence Scale
- Set the fence about 2″ (50mm) from the blade and make a test cut with a jointed board.
- Measure the cut piece with calipers.
- Adjust the rip fence scale to match the exact measurement.
- Once calibrated, you won’t need to guess or make multiple test cuts.
Blade Choice
- Rip blade (24T):Fast cutting along the grain.
- Combination blade (40–50T): General-purpose cutting, balanced speed and smoothness.
- Crosscut blade (60–80T): Smooth cuts across the grain for fine finishing.
Always keep blades sharp; dull blades lead to burning, tear-out, and inaccurate cuts.
Blade Height Setting
- Adjust the blade so that the teeth extend 1/8–1/4 inch above the wood. For hardwoods, set the blade height closer to 1/4 inch. For softwoods, 1/8 inch is sufficient. For plywood or MDF, 1/8–3/16 inch works best to prevent tear-out.
- Too low: incomplete cuts, burning edges.
- Too high: increased risk of kickback.
- Test the setting on scrap wood before cutting the actual piece.
Cleaning & Maintenance
- Dust, resin, and debris buildup can affect accuracy.
- Clean the blade regularly with blade cleaner or rubbing alcohol.
- Keep the tabletop free of sawdust to prevent raising the workpiece slightly, which could throw off precision.
Optional Accessories for Accuracy
- Featherboards: Hold wood firmly against the fence to reduce drift.
- Zero-clearance insert: Prevents tear-out and chip-out, especially on plywood and MDF.
- Digital fence system: Provides precise rip width measurements for professional-level accuracy.
- Push blocks or push sticks: Essential for narrow or small pieces.
Safety Practices Before Cutting
Before making any cuts, safety should always be the top priority. Always wear safety glasses and hearing protection, since both dust and noise can cause harm. Keep your hands away from the spinning blade, and use push sticks or push blocks when cutting narrow or small pieces. It’s also safer to stand slightly to the side rather than directly in line with the blade, as this reduces the risk of injury in case of kickback.
A riving knife or splitter is another essential feature that helps prevent wood from pinching the blade and causing kickback. Never reach over a moving blade; wait until it comes to a complete stop before removing offcuts or small pieces. For extra protection, you can also use anti-kickback pawls. Finally, make sure your workspace is well-lit, clear of clutter, and free from distractions—because precision and safety both depend on focus and preparation.
Measuring and Marking the Wood
Precision starts before the blade touches the wood. Proper measuring and marking ensure your cuts are exact.
Tools for Accurate Measurement
- Measuring tape: For general lengths.
- Combination square: For perfect 90° lines.
- Carpenter’s square: For larger boards.
- Marking knife: For ultra-precise lines.
- Optional: Laser guides or digital calipers for advanced precision.
Marking Techniques
- Always mark on the face side of the wood.
- Extend the line across the full width of the board.
- Indicate the waste side with a small “X” to avoid cutting the wrong section.
- When marking angled cuts, use a protractor or adjustable bevel gauge.
The Golden Rule
- Measure twice, cut once.
- Double-check fence and miter gauge settings before starting.
- For repetitive cuts, consider marking all pieces first before cutting.
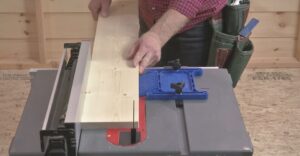
Setting the Fence or Miter Gauge
Choosing the correct guide ensures straight and square cuts.
Using the Rip Fence (Rip Cuts)
- For cuts along the grain, the rip fence is your guide.
- Keep the wood flush against the fence throughout the cut.
- Adjust the fence carefully to the exact width required.
Using the Miter Gauge (Crosscuts)
For cuts across the grain, always use a miter gauge or a crosscut sled instead of the fence.
Warning: Never place the workpiece directly against both the miter gauge and the rip fence at the same time, as this can trap the offcut and cause kickback.
Stop Blocks for Repetitive Accuracy
- Set up a stop block for multiple identical cuts.
- This reduces measurement errors and speeds up repetitive cutting tasks.
Jig for Repetitive Rip Cuts
- Make a simple hardwood gauge (about 7″ long and 1″ thick).
- Mount it to the rip fence clamping bar with screws and slots so it can adjust.
- Once set with a sample piece, you can cut identical-width boards quickly without measuring each time.
Advanced Tools
- Crosscut sled: Provides extreme accuracy for crosscuts and miters.
- Digital fence systems: Allow precise measurement and repeatable rip cuts.
Making the Cut
Positioning the Wood
- Firmly place the board against the fence or miter gauge.
- Align the marked line exactly where the blade will cut.
- Keep the path clear of dust for better visibility.
Feeding Technique
- Push the wood slowly and steadily.
- Let the saw do the work—forcing wood can cause crooked cuts or burn marks.
- For small or awkward pieces, use clamps or featherboards to hold the wood steady.
Finishing the Cut
- Let offcuts fall naturally; do not grab them while the blade spins.
- Turn off the saw before removing small pieces near the blade.
Checking and Adjusting Accuracy
After making a cut, always check the result with a try square to confirm squareness and use calipers or a ruler to verify width. If the cut is slightly off, trim a thin strip or lightly sand the edge instead of forcing a new cut. Recording these small adjustments in a cutting logbook helps you remember which blade, fence setting, or wood type worked best, making your future cuts more consistent and accurate.
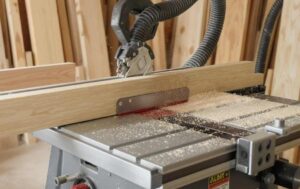
Types of Cuts and Material-Specific Tips
- Rip Cuts: Long cuts along the grain using the rip fence. Feed wood slowly for hardwoods, a bit faster for softwoods.
- Crosscuts: Cuts across the grain using a miter gauge or crosscut sled. Use a zero-clearance insert to reduce chip-out on plywood and MDF.
- Bevel Cuts: Tilting the blade for angled cuts. Measure angles carefully with a bevel gauge or digital angle finder.
- Miter Cuts: Angled crosscuts with a miter gauge or sled. Useful for frames, picture molding, and joinery.
- Dado/Groove Cuts: Non-through cuts for joinery using a dado blade set. Ensure proper height, width, and alignment.
- Material Tips: Different types of wood need slightly different handling on a table saw. When working with hardwood, always feed the board slowly, as rushing can cause the cut to drift off line. Softwood, on the other hand, is more prone to tear-out, so take extra care to support the fibers during cutting. For sheet goods like plywood or MDF, using a zero-clearance insert helps reduce chip-out and ensures cleaner edges. If the wood is warped or twisted, make sure to flatten it first; otherwise, the cut will never be accurate, no matter how well the saw is set up.
Using a Spacer Block for Safer Crosscuts
Ensure the spacer block is exactly the measured width. Use calipers or a ruler to verify the size before use. Attach the spacer block (e.g., 100mm wide hardwood piece) to the fence. This leaves a proper gap between the cutoff and the fence, making repetitive crosscuts accurate and safe.
Common Mistakes & Troubleshooting
- Dull blade: rough edges, burns:sharpen or replace.
- Misaligned fence: wood drifts: realign fence.
- Cutting too fast: crooked edges, burns: slow feed rate.
- Fence + miter gauge used together: dangerous binding: use separately.
- Kickback: always use riving knife, push sticks, and don’t force wood.
Extra Pro Tips for Perfect Accuracy
- Work in a well-lit shop.
- Use clamps or featherboards for small/awkward pieces.
- Keep a cutting logbook with blade, fence, and wood type.
- Practice on scrap wood before cutting expensive material.
- Use advanced tools: crosscut sled, digital fence, zero-clearance insert for ultimate precision.
FAQs
What is the best blade for accurate cuts?
A fine-tooth carbide-tipped blade with 40–60 teeth is ideal. It provides clean, smooth cuts and reduces tear-out, making your work more precise and professional-looking.
How do I prevent burning wood?
Always use a sharp blade and make sure your fence is properly aligned. Feed the wood steadily without forcing it, and avoid cutting too fast. This prevents burning, rough edges, and uneven cuts.
Can beginners achieve accurate cuts?
Absolutely! With practice, even beginners can achieve high precision. Start with scrap wood, focus on consistent technique, and use measuring tools to build confidence before working on valuable pieces.
How can I make multiple pieces exactly the same size?
Use a stop block or a spacer block on your rip fence or miter gauge. Measure carefully with calipers or a ruler, and test on scrap wood first. This ensures each piece is identical, saves time, and reduces errors when cutting multiple boards.
Final Thought
Cutting accurately on a table saw isn’t about speed—it’s about preparation, patience, and steady technique.
Begin by tuning your saw, selecting the appropriate blade, and measuring with precision. Feed the wood smoothly instead of rushing.
For extra accuracy, use simple helpers like sleds, stop blocks, and featherboards. Experiment with offcuts before moving on to valuable pieces, so you can refine your skills safely.
Ultimately, accuracy is a habit that you develop over time. Once mastered, every project—whether a cabinet, a table, or a small decorative piece—will fit together perfectly.

Welcome to Homenias, I’m Jaman M, and I’m here to help you discover the best home products. With years of experience, they offer genuine reviews and helpful guides. Their mission is to make your choices easier. It’s organizing your space or finding creative solutions. Explore how the right products can enhance your everyday life. Don’t miss out on finding the best home products to raise your living experience.