If your vacuum isn’t picking up dirt as it should, the first place to check is the vacuum cleaner filter. Over time, dust, pet hair, and debris can clog it, lowering suction and even releasing allergens back into your home. Knowing how to clean vacuum cleaner filter properly can restore performance and help you breathe easier indoors.
Table of Contents
Introduction
Vacuum cleaners are a must-have in every home, saving time and effort. But even the best models need regular maintenance to perform well. A clean filter ensures strong suction, traps dust and allergens effectively, and extends the life of your vacuum.
When filters get clogged, your vacuum struggles to work efficiently. Suction drops, cleaning takes longer, and dust that should be trapped can escape into the air. For people with allergies or respiratory issues, this can be a serious problem.
Don’t worry—cleaning your filter isn’t difficult. Whether you have a HEPA filter, foam filter, bagless vacuum, or even a bag vacuum, the steps are simple and manageable. Follow this guide, and your vacuum will run like new, keeping your home cleaner and healthier.
Learn more: Want to go beyond just cleaning the filter? You might also need to replace the vacuum belt or even repair a damaged hose for full performance.
Why Cleaning Your Vacuum Cleaner Filter Matters
Improves Performance
The filter in your vacuum becomes clogged, reducing the airflow and forcing your vacuum to work harder, less and less capable of removing the dirt you are vacuuming. The filter is cleaned, returning efficiency and removing dirt from particles that might not be filtered.
Enhances Air Quality
Allergens, dust, and small particles are trapped by filters. These contaminants are then released again into the air through a dirty filter, limiting indoor air quality. This reduces the risk of getting this. Especially in vacuums with high-efficiency particulate air (HEPA) filters, proper care ensures better air filtration.
Prolongs Vacuum Lifespan
A clean filter removes strain from the vacuum motor, making it easier on the motor, preventing overheating, and prolonging the life of the vacuum.
Saves Money
Keeping your vacuum running optimally prevents premature replacement instead of just blowing money on repairs or replacements.
Tools and Materials You’ll Need
Before you start, gather the following:
- Soft brush or toothbrush
- Warm water
- Mild dish soap
- Microfiber cloth
- Vacuum user manual
- Replacement filter (if needed)
- Container or basin
10 Easy Steps to Clean a Vacuum Cleaner Filter

Step 1: Check the User Manual
All vacuum cleaners are different. Check your user manual for particularly regarding filter type and how to clean. Some filters are washable, some are dry clean only, and some must be replaced. By knowing these nuances, you stay away from damaging the filter and voiding the warranty.
Step 2: Unplug the Vacuum Cleaner
Safety is always the first priority. Never unplugging the vacuum is an extra measure because you don’t want to accidentally turn it on while cleaning and cause injuries or damage to your appliance.
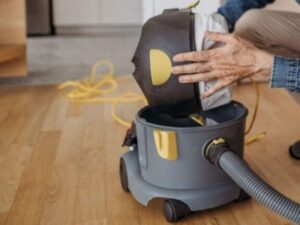
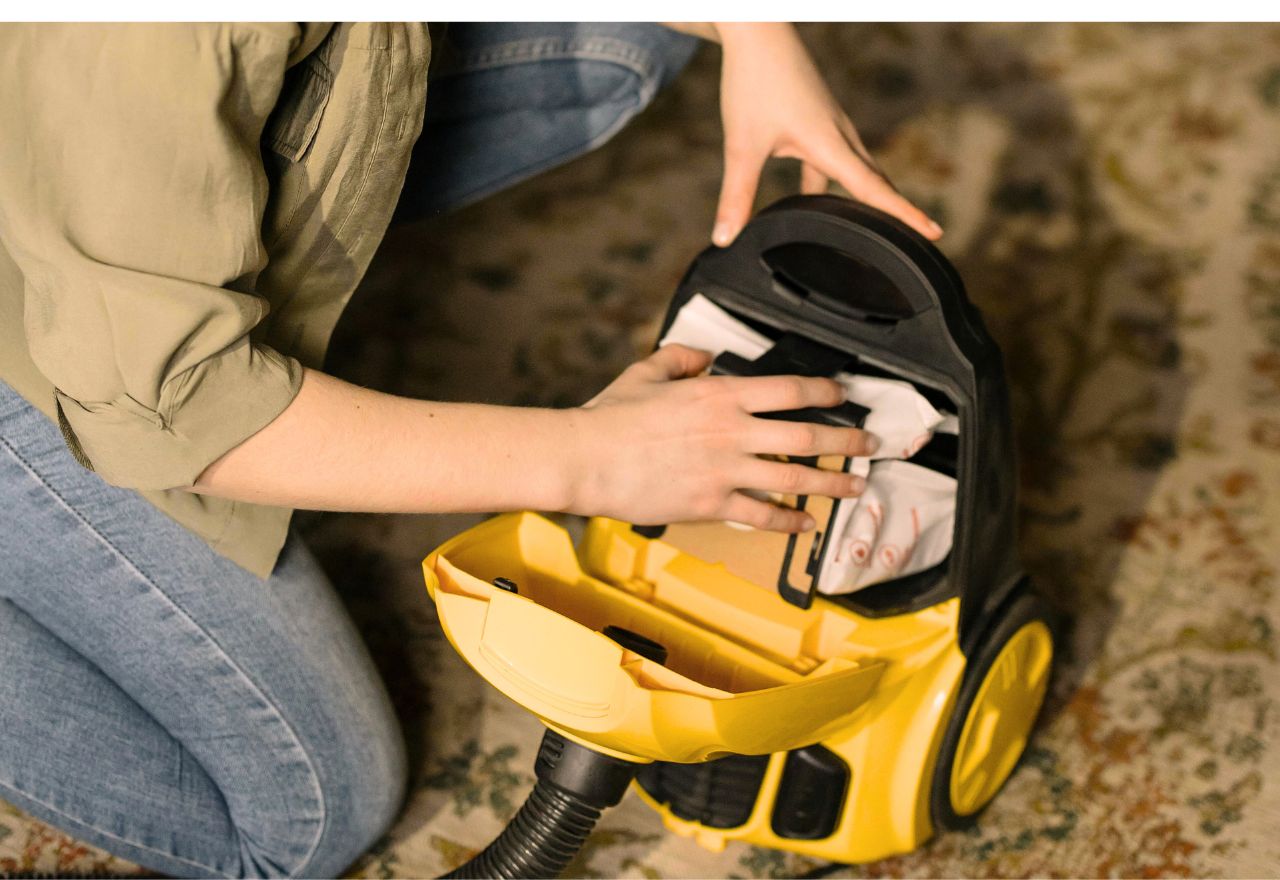
Step 3: Locate and Remove the Filter
Decide where in the vacuum cleaner the filter is located. Areas commonly found are close to the dust bin, or behind a panel, or at the base of the vacuum. Don’t scatter dust and debris by removing the filter carefully. Write down its orientation for future installation.
Step 4: Shake Off Loose Debris
To dislodge loose dirt and dust from the filter, take it outside and tap gently on the edge of a trash can. For HEPA filters, use a soft brush to remove surface debris without damaging sensitive fibers.
Step 5: Rinse with Water (if Applicable)

For washable filters, hold them under lukewarm running water. To flush out trapped particles, allow the water to flow through the filter in the direction opposite to airflow. Hot water is to be avoided in use, as it could make the filter material more brittle.
Step 6: Use Soap for a Deeper Clean
Be prepared to sing your own chorus if the filter is particularly dirty: Mix a bit of mild dish soap with warm water in a basin. Filter, it submerges and, using a soft brush or toothbrush, gently scrub it. It helps to take off tough dirt and grease.
Step 7: Dry the Filter Thoroughly

Once cleaned, though, ensure to dry the filter completely before reinstalling it. For at least 24 hours, put it in a well-ventilated place, not in direct sunlight, or in the presence of heat sources. Odds are any moisture left in the filter can translate to mold growth or damage the vacuum.
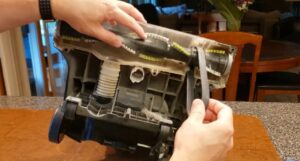
Step 8: Inspect for Wear and Tear
Look at the filter and see if it’s damaged; maybe there’s a tear in it, maybe it’s bent, maybe it’s wearing out too much. If the filter doesn’t perform as it should, replace it for continued performance. These filters are also recommended by most manufacturers to be replaced periodically, even with regular cleaning.
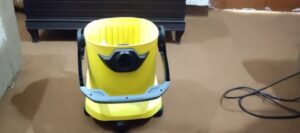
Step 9: Reinstall the Filter
When the filter dries out completely and isn’t damaged, reinstall the filter into the vacuum cleaner. Make sure that it sits well, and it’s correctly aligned so there are no air leaks. If you’re not sure of the use placement, refer to the user manual.
Step 10: Test Your Vacuum Cleaner
Take the vacuum back out, plug it in, and run a check to see if it works properly. Look for better suction power, quieter operation, and no dust emission. If the vacuum runs well, you’ve just cleaned the filter.
How Often Should You Clean Your Vacuum Filter?
- Weekly: For homes with pets or heavy usage.
- Monthly: For average usage in smaller households.
- After Every Use: For handheld or small cordless vacuums.
Common Mistakes to Avoid
- Skipping the Manual: Always follow manufacturer guidelines.
- Using Harsh Chemicals: Stick to mild soap and water.
- Reinstalling a Wet Filter: Ensure the filter is fully dry to prevent mold growth.
- Ignoring Damage: Replace worn filters promptly.
- Overcleaning: Avoid cleaning non-washable filters, as this can degrade them.
FAQ
Can I use a dishwasher to clean my vacuum filter?
Most vacuum filters are not dishwasher safe. The heat and detergents will burn the filter. Rinse with water and mild soap; clean always by hand.
How do I know if my filter needs replacement?
Tea should be replaced if the filter is torn, deformed, or just not cleaned. Generally speaking, HEPA filters should last 6 – 12 months of use.
Can I clean a HEPA filter?
You can wash some HEPA filters and not others. Specific instructions will be given in your user manual. If your HEPA filter has a non-washable label, then tap off loose debris and replace it as needed.
What happens if I don’t clean the filter?
A clogged filter reduces the suction power, puts stress on the motor, and changes the air quality and air efficiency, along with the release of dust in the air. I It will also wear over time, damaging the motor on the vacuum and may call for expensive repairs or replacement.
Can I clean a paper filter?
No. Paper filters, as you already know, are non-washable. Gently tap off loose debris and replace as soon as they get too dirty not to work.
How can I extend the life of my filter?
Regularly cleaning your filter and not overfilling your vacuum’s dust bin will help to extend your filter life, and always use the vacuum according to manufacturer’s guidelines. Proper storage and handling will also help prevent unnecessary wear and tear.
Are there universal filters for all vacuums?
Filters are usually of one type and one brand, and only for the type and brand of the vacuum cleaner they are being used in. The best practice always purchases filters recommended by the manufacturer and ensures filter compatibility as well as optimal performance.
What is the difference between washable and non-washable filters?
Non-washable filters require a replacement when they are dirty, and the filters are not washable and must be discarded when they are full of dirt. It’s worth checking the specifications of your filter in the user manual.
Can I use compressed air to clean my filter?
Use of compressed air will clean some filters, particularly non-washable ones. But, be careful here; avoid damaging the filter root material with low pressure if you can.
Is it safe to use the vacuum without a filter temporarily?
It’s not that you can’t use the vacuum without a filter, in fact, it’ll damage the motor and dust and allergens will be blown into the air. Before using the vacuum, it’s always important to make sure there is a filter which is installed.
Final Thoughts
A small step toward ensuring your vacuum’s efficiency and long-term use is maintaining a clean vacuum cleaner filter. A dirty filter is more than bad for the performance of your vacuum: it’s also potentially bad (literally) for your health, as it recycles dust and allergens back into your home. Following the complete 10-step guide teaches you to take care of your vacuum cleaner so that every time you use it, it gives you the best results possible.
Cleaning a regular filter also increases suction power, as well as protecting the vacuum cleaner’s motor from damaging overwork, providing additional life to your vacuum cleaner. A clean filter also adds to clean air among houses with kids, pets, or with people who have allergies. If you’re using foam filters, rinse them carefully and always reinstall the filters once they are air dry.
However, different types of filters need different care. Consult the user manual for specific instructions and follow the manufacturer’s advice. When replacement filters are not covered in the cost of your paper or plastic filters, invest in them as a small expense that will save you much greater costs down the line through repairs or replacements.
Thus, cleaning your vacuum cleaner’s filter is an easy and effective task that will significantly enhance the efficiency and durability of your vacuum. Do this regularly so you can benefit from a cleaner, healthier house environment. A good vacuum cleaner isn’t something to be thrown in the closet and forgotten – start today, and let your vacuum cleaner work as effectively as it was designed to.

Welcome to Homenias, I’m Jaman M, and I’m here to help you discover the best home products. With years of experience, they offer genuine reviews and helpful guides. Their mission is to make your choices easier. It’s organizing your space or finding creative solutions. Explore how the right products can enhance your everyday life. Don’t miss out on finding the best home products to raise your living experience.