Building a table saw might feel like a job for experts. But with the right steps and tools, anyone, even a DIY beginner, can build one at home. You don’t need a full workshop or expensive gear. Just follow a simple plan and take your time.
This guide, I’ll walk you through everything about how to build a homemade table saw. We’ll use simple materials like plywood and a circular saw to put together a solid, budget-friendly table saw you can actually rely on. If you love working with your hands or just want to save some cash, this is a great project to try.
Table of Contents
Why Build Your Own Table Saw?
Building your own table saw is a smart choice for many reasons. First, buying a good-quality table saw can be quite expensive. Even mid-range models often cost several hundred dollars, which might not be affordable for hobbyists or occasional woodworkers. When you build your own, you save a lot of money.
Second, making your own table saw gives you the freedom to customize it. You can adjust the size and features to fit your workspace and the kinds of projects you want to do. This means it can be more practical and useful for your specific needs.
Third, the process of building a table saw helps you learn important skills. You get hands-on experience with tools and woodworking techniques, which builds your confidence and knowledge.
Finally, there is a perfect sense of accomplishment in using a tool you made yourself. It makes your work more personal and rewarding.
Overall, a homemade table saw is not only budget-friendly but also adaptable and educational, making it a valuable addition to any DIY workshop.
Materials Needed for Homemade Table Saw
- Circular saw
- Laminated particle board (approx. 1.8 cm thick, 50 cm wide, 80 cm long), recycled material preferred
- 16 mm flathead wood screws
- Wooden beams (8×4 cm) for the frame and leg support
- Zip ties
- Power strip with on/off switch
- Clamps
- Measuring tape, pencil, and square tool
Tools Required
- Drill with a 4 mm drill bit
- Screwdriver
- Circular saw (for cutting wood)
- Clamps
- Sandpaper (optional)
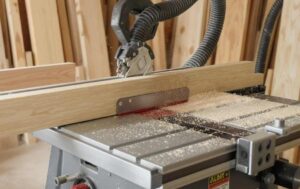
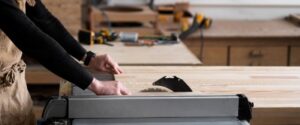
How to Build a Homemade Table Saw Guide
Step 1: Drill Mounting Holes in the Circular Saw Base
To build a reliable homemade table saw, start by checking if your circular saw’s base has pre-drilled mounting holes. If there are none, carefully drill 4 mm holes into the metal base plate, making sure not to damage any internal wiring or structural parts. These holes are essential for securely mounting the saw to your tabletop. After drilling, smooth out any rough edges or burrs with sandpaper or a metal file.
This preparation ensures that the saw sits flat and stable under the table, which is crucial for accurate and safe cutting with your DIY table saw.
Step 2: Choose a Flat, Strong Tabletop
Use an old cabinet panel or laminated particle board (around 1.8 cm thick, 50 cm wide, 80 cm long).
- The board should be flat and have square corners to help make accurate cuts.
- Laminated surfaces help reduce friction when sliding wood over the top.
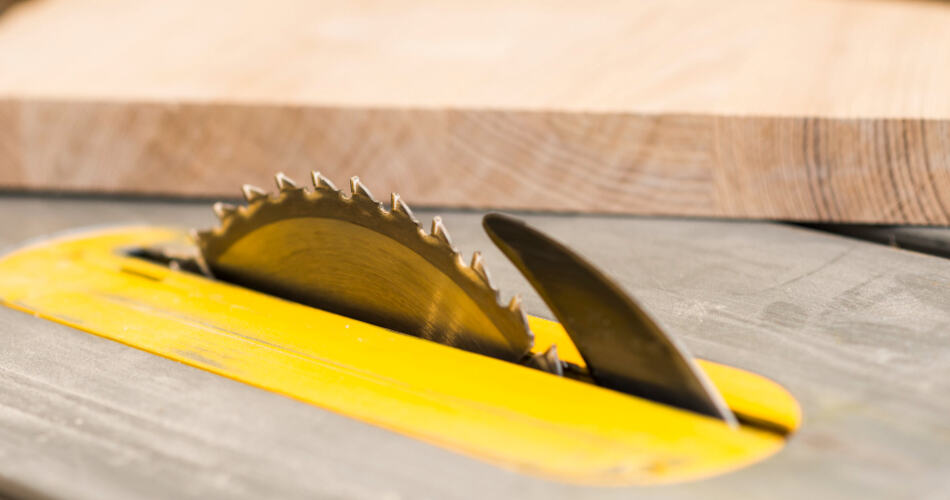
- Also, cut a narrow kerf slot on the tabletop where the blade comes out. This will help you see exactly where the blade will cut and improve accuracy.
Reason: A straight and square board ensures better accuracy when cutting wood.
Step 3: Position the Saw Under the Tabletop
- Decide where to place the circular saw beneath the table, usually 30 cm from the front edge.
- This allows space in front of the blade to position wood before cutting.
- Place the saw, align it straight using a square tool, and mark the hole positions on the board.
Make sure the blade is aligned with the table’s front edge for square cuts.
Step 4: Attach the Saw to the Tabletop
Next, pre-drill matching holes in your laminated particle board tabletop where you marked the saw’s mounting points. Use 16 mm flathead wood screws to firmly attach the circular saw to the underside of the board. Make sure the screws are tightened evenly so the saw base does not warp or bend.
Before fully securing the saw, adjust the blade’s cutting depth so it protrudes about 5 to 10 mm above the tabletop surface. Setting the correct blade height is important to achieve clean cuts while keeping the exposed blade minimal for safety when using your homemade table saw.
Step 5: Add Support Beams Under the Table
To strengthen your DIY table saw’s structure, add support beams under the tabletop. Cut two wooden beams approximately 8 by 4 cm and screw them parallel to each other across the underside of the board. These beams provide a sturdy frame that supports the table legs and distributes weight evenly, preventing sagging or wobbling during use. A solid foundation is key for maintaining accuracy and safety when cutting wood with your homemade table saw.
Step 6: Make and Attach Legs
- Cut four equal-length legs from leftover boards. Make sure they’re strong enough to hold the weight.
- Screw each leg securely to the support beams.
- For extra stability, you can also add diagonal bracing or use metal L-brackets at each corner joint. This will prevent side-to-side wobbles during cutting.
You can use corner brackets or L-angles for extra strength at joints.
Step 7: Set up Power Control (Safe Switch)
For a safer work of your homemade table saw, set up a convenient power control system. Use zip ties or tape to lock the circular saw’s trigger in the ON position. Then, plug the saw into a power strip equipped with an ON/OFF switch mounted within easy reach. This setup allows you to safely start and stop the saw without touching the trigger directly, reducing the risk of accidental starts.
Always ensure your power strip has surge protection and is properly grounded. Remember to unplug the saw completely before making any blade changes or adjustments to maintain safety.
Step 8: Make a Side Fence
To keep your cuts straight and precise, make a side fence for your homemade table saw. Use a straight wooden strip and clamp it parallel to the saw blade on the tabletop. After clamping, measure the distance from the fence to the blade at both the front and back to ensure perfect parallelism.
This prevents wood binding and kickback during cutting. While a simple clamped fence works well for beginners, upgrading to an adjustable fence system with T-tracks or metal rails will improve accuracy and ease of use over time.
Do a Test Run
- Plug in the power strip, wear your safety gear, and test the saw.
- Use scrap wood to check if the saw cuts cleanly and the blade is square to the table.
- Also, check if the table is stable, and tighten any loose screws if needed.
Important: Listen for any unusual sounds or vibrations that might signal loose parts.
Follow Safety Rules
When using your homemade table saw, always wear safety goggles to protect your eyes from flying sawdust and small wood chips. If you plan to cut for long periods, ear protection is important to prevent hearing damage from the saw’s noise. Keep your hands away from the blade at all times; use a push stick when making narrow cuts to avoid accidents. Make sure your workspace is clean, well-lit, and free from clutter, which helps you work safely and efficiently.
Wearing a dust mask or respirator is especially necessary when cutting indoors to avoid breathing in harmful dust particles. It is also important to regularly clean and inspect your saw blade. A dull or dirty blade can overheat, which might cause dangerous kickbacks. Never touch the blade area unless the saw is unplugged and the blade has completely stopped moving.
For added safety, avoid wearing loose clothing or jewelry when working with power tools, as these can get caught in the blade.
To learn more detailed safety and maintenance tips for all types of table saws, check out our Ultimate Guide on Table Saw Safety Tips & Maintenance.
Upgrades for Better Performance
To improve your homemade table saw’s accuracy, consider building or installing a permanent fence system, such as a Biesemeyer-style fence. This upgrade will help you make straighter, more precise cuts. Adding an outfeed table is also useful when working with long wood pieces, as it supports the material as you push it through the blade, making the process safer and easier.
Connecting a dust collection system or shop vacuum will keep your workspace cleaner by removing sawdust and debris, which improves air quality and visibility. If your workspace is small, think about using detachable or folding legs to save space when the table saw is not in use. Keep in mind that most homemade table saws have a fixed blade height, so it’s important to carefully set the blade depth before mounting to match the thickness of the wood you plan to cut.
FAQ
What type of circular saw is best for building a homemade table saw?
Any standard circular saw with a sturdy base plate will work. Choose one with at least a 7-1/4 inch blade for versatility. Ensure it has a reliable motor (10-15 amps) for consistent cutting power. Corded saws are preferred for continuous use, but a high-quality cordless saw can work if you have a strong battery.
Can I cut hardwood with a homemade table saw?
Yes, if your circular saw is powerful enough and has a sharp blade. Be slow and steady for best results.
How do I keep the saw blade straight when cutting?
Align your saw carefully when mounting it. Also, use a good fence and push material steadily through the blade.
How deep can a homemade table saw cut?
It depends on your circular saw’s blade and how much is exposed above the tabletop. Typically, you can cut 1.5 to 2.5 inches deep. This setup doesn’t allow for adjustable blade height.
Is it safe to use a homemade table saw?
Yes, if built carefully and used with safety gear. Always unplug the saw before adjustments, and avoid wearing loose clothing. Use a push stick and keep the work area clean.
Final Thought
Building a homemade table saw may seem challenging, but it’s possible with the right steps. You don’t need fancy tools or a big workshop. Just some basic materials, a circular saw, and a bit of time.
This DIY project is a smart choice if you love woodworking or want to save money. It gives you more control over your setup and helps you understand how your tools work. Plus, it feels great to build something with your own hands. Always put safety first. Wear proper gear. Check your setup before every use. Never rush. With your homemade table saw ready, you’ll be able to take on more woodworking tasks with ease.
From simple cuts to detailed builds, this tool will quickly become one of your favorites in the shop.
Now that you know how to build a homemade table saw, go ahead and give it a try. It’s a rewarding project that pays off every time you switch it on. Happy building and stay safe.

Welcome to Homenias, I’m Jaman M, and I’m here to help you discover the best home products. With years of experience, they offer genuine reviews and helpful guides. Their mission is to make your choices easier. It’s organizing your space or finding creative solutions. Explore how the right products can enhance your everyday life. Don’t miss out on finding the best home products to raise your living experience.