If you’ve ever wondered how to use a vacuum sealer to keep food fresh, you’re not alone. Many home cooks are turning to this simple tool to store food longer, cut down on waste, and save money. From raw meats and veggies to cooked meals and dry goods, vacuum sealing can extend shelf life while keeping taste and texture intact.
The process is easy to learn and even easier to use. With a little practice, you can create airtight seals that protect food from air, moisture, and freezer burn. Whether you’re meal prepping, bulk buying, or planning for sous vide, a vacuum sealer helps you stay organized and reduce food spoilage.
In this guide, you’ll learn everything step-by-step so you can start sealing smarter today.
Table of Contents
What Is Vacuum Sealing?
Vacuum sealing is the process of removing air from a bag or container and sealing it tightly to prevent air from getting back in. This creates an airtight environment that helps:
- Prevent freezer burn
- Slow down bacteria growth
- Preserve taste, texture, and nutrients
- Extend shelf life by up to five times compared to regular storage
From raw meats to pantry staples, air removal systems make food storage more effective and efficient.
Benefits of Using a Vacuum Sealer
- Benefits of Using a Food Sealing Device:
- Save food: Reduce spoilage and waste by sealing both raw ingredients and cooked meals. Achieve extended freshness for all your provisions.
- Save money: Buy in bulk and preserve portions for future use. This is a key aspect of food preservation for savings.
- Save time: Perfect for meal prepping, batch cooking, and sous vide recipes, streamlining your kitchen tasks.
- Reduce waste: Lower both food waste and plastic waste with reusable vacuum bags, contributing to sustainable living.
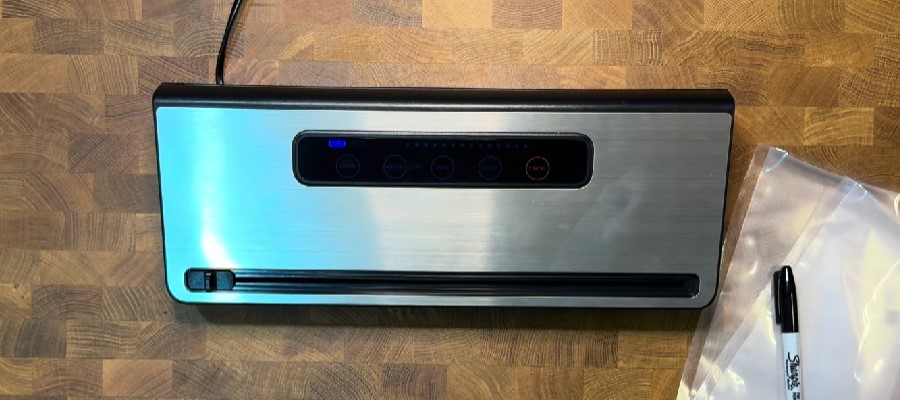
What You Need
- A vacuum sealer machine – Choose between countertop (powerful) or handheld (portable) models.
- Vacuum sealer bags or rolls – Select freezer-safe, microwaveable, and durable materials.
- A clean flat surface – This makes sealing easier and helps avoid wrinkles in the seal.
- Food that’s clean, dry, and ready to store.
Optional tools include:
- Jar sealers
- Bottle stoppers
- Reusable or stand-up Easy Fill Bags
How to Use a Vacuum Sealer: Instructions
1. Prepare the Food
Before sealing, it’s important to properly prepare your food to ensure the best results. Start by cleaning and trimming any excess fat, skin, or unwanted parts from meat, poultry, or fish. Cut larger items into manageable portions based on how you plan to use them later — whether for single meals, meal prep, or bulk storage.
Fruits and vegetables should be washed and thoroughly dried. For produce with high moisture content, such as berries or cut vegetables, pat them dry with a paper towel. Too much moisture can weaken the seal or cause freezer burn.
If you’re sealing cooked meals or leftovers, let the food cool completely before placing it in the bag. Sealing warm or hot food can trap steam, which creates moisture inside the bag and may lead to spoilage.
Also, consider pre-freezing soft or wet items (like soups, sauces, or fresh meats) for 1–2 hours before vacuum sealing. This helps maintain their shape and prevents liquid from interfering with the sealing process. Taking a few extra minutes to prep food properly makes the vacuum sealing method more effective and ensures your food stays fresh, flavorful, and safe for longer.
2. Fill the Vacuum Bag
acuum sealer bag. Make sure you don’t overfill the bag, leave at least 2 to 3 inches of space at the open end. This extra room is essential because the machine needs that space to create a strong airtight seal.
Arrange the food evenly inside the bag so that it lies flat. Avoid piling food too high or creating thick clumps, as this can make sealing difficult or lead to incomplete suction. For delicate items like berries or sliced fruits, try to spread them out in a single layer to prevent crushing.
If your food has any moisture or liquids, place a paper towel inside the bag or partially freeze the items before sealing. Excess moisture can interfere with the vacuum process and reduce seal quality.
By properly filling the bag, you ensure a tight seal and maximum freshness for your food. Taking this simple step helps prevent leaks, freezer burn, and spoilage, so your airtight sealed food stays fresh longer.
3. Load the Bag into the Machine
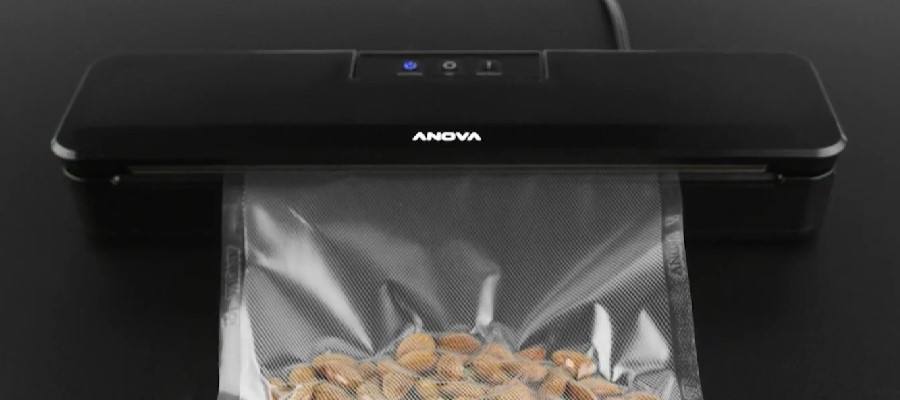
Once your food is packed in the vacuum bag, place the open end into the sealing slot. Make sure it’s flat and smooth so the machine can seal it properly. Close the lid firmly until it clicks, or follow your machine’s locking step. Double-check that the bag is lined up and not wrinkled, this ensures a strong, air-tight seal. If you’re using a chamber vacuum sealer, lay the entire bag inside. This step may seem simple, but careful placement helps avoid sealing issues later and keeps your stored food fresh much longer.
4. Start the Vacuum Process
Close the lid until it clicks (for most models). Press the “Vacuum & Seal” button. Some machines offer modes like “Dry” or “Moist” – use the right one for your food type. This initiates the food vacuuming cycle.
5. Let the Machine Finish
When using your vacuum sealing device, it’s easy to rush, but letting your machine do its job makes a huge difference. Move slowly and steadily. This gives the vacuum sealer’s suction ample time to remove all air and create a strong, complete seal. Rushing means leaving air pockets behind, which can compromise food freshness and lead to spoilage. For effective long-term preservation, take your time. A patient approach ensures your food stays truly fresh, extending its safe storage life and preserving its quality.
6. Label and Store
Write the date and food name on the bag using a permanent marker. Then store it in the fridge, freezer, or dry pantry.
What Foods Can and Can’t Be Vacuum Sealed
Foods you can vacuum seal successfully include:
- Raw meats and seafood
- Hard and semi-hard cheeses
- Berries and sliced fruits
- Blanched vegetables
- Flour, sugar, coffee, and dried goods
- Baked goods (freeze before sealing)
Foods that don’t work well for vacuum sealing:
- Soft cheeses like brie or blue cheese
- Mushrooms
- Raw onions and garlic
- Leafy greens such as lettuce or cabbage
- Hot, freshly cooked vegetables (cool first)
How Long Does Vacuum-Sealed Food Last?
Vacuum sealing can significantly extend the shelf life of various foods. Here are some typical storage comparisons:
Raw meat stored in the freezer usually lasts around six months, but when vacuum sealed, it can stay fresh for up to three years. Cooked meals that typically last just 3 to 5 days in the fridge can remain safe to eat for 1 to 2 weeks. Cheese, which might spoil in one month, can last up to six to eight months when vacuum sealed. Pantry items like flour and sugar can extend from a 6–12 month shelf life to as much as two years.
What to Look for When Buying a Vacuum Sealer
When choosing the best vacuum sealer for your needs, consider the following features:
- Built-in bag cutter for quick and precise cutting
- Moist/Dry settings to adjust based on food type
- Compact design if space is limited
- Accessory compatibility for jars and bottles
- Automatic or manual sealing based on your preference
Vacuum Sealing Tips and Tricks
- Blanch vegetables like green beans and broccoli before freezing to preserve texture and color.
- Vacuum sealing speeds up marination, making food ready in as little as 30 minutes.
- You can seal snacks like chips or crackers, but avoid vacuuming them to prevent crushing.
- Vacuum sealing also works for non-food items such as important documents, jewelry, and seasonal decorations.
- Regular maintenance of your kitchen tools is key. If you’re also using vacuum-based tools for cleaning, check out our guide on repairing vacuum cleaner hose to fix suction issues quickly.
FAQ
Can I reuse vacuum bags?
Yes, especially if you’re storing dry food. Just wash and dry thoroughly before reuse.
Can I vacuum seal liquids?
Only with a chamber vacuum sealer. Otherwise, freeze the liquid first before sealing.
Should I use vacuum seal bags or rolls?
Bags are convenient, while rolls allow you to customize the size. Choose based on what works best for your needs.
Can I vacuum seal hot food?
No. Let it cool first to avoid spoilage and protect your vacuum sealer.
Final Thoughts
Now that you know how to use a vacuum sealer, it’s time to put that knowledge into action. This tool can help you store food longer, cut down on waste, and even save money each month. Whether you’re freezing raw meat, sealing leftovers, or prepping for sous vide cooking, vacuum sealing is a smart habit to build into your kitchen routine.
The process is simple, but the results are long-lasting. With just a few easy steps, you can protect your food from air, moisture, and freezer burn. Over time, you’ll notice fewer spoiled items and more room in your fridge and freezer.
By using a vacuum sealer the right way, you gain more control over your food storage. It’s a small step toward better planning, less stress, and a cleaner kitchen.

Welcome to Homenias, I’m Jaman M, and I’m here to help you discover the best home products. With years of experience, they offer genuine reviews and helpful guides. Their mission is to make your choices easier. It’s organizing your space or finding creative solutions. Explore how the right products can enhance your everyday life. Don’t miss out on finding the best home products to raise your living experience.