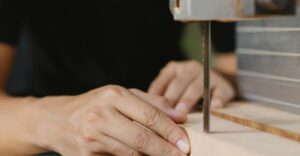
If you’re ripping a board with a table saw, then take your time, line it up with the grain, and feed it through the blade slowly and steadily. The blade is placed in the center of a flat table, and a rip fence acts as a guide to ensure a straight cut.
When wood is cut on a table saw during a rip cut, the blade slices lengthwise with the grain, producing long, straight boards.
When cutting wood, the right type of blade must be used, and it must be adjusted properly. Using safety tools like a push stick and a riving knife makes the work much easier and safer. In this way, you can make clean, straight cuts while cutting down the chance of the wood slipping suddenly and causing injury.
In this guide, you’ll learn how wood is cut when ripping with a table saw, what a rip cut in woodworking means, and how to use a rip fence properly.
Table of Contents
What Does “Ripping” Mean in Woodworking?
In woodworking terms, a rip cut refers to cutting a board lengthwise along the grain. This is the opposite of “crosscutting”, where the grain is cut against the direction. Ripping on a table saw is typically used to create custom-width boards for projects like furniture, trim, or joinery.
How a Table Saw Cuts Wood When Ripping

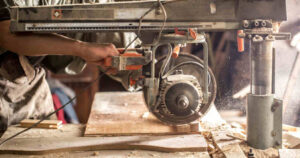
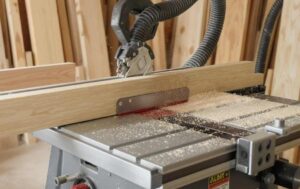
The table saw is a stationary power tool that has a circular blade. The blade extends out from the surface of a flat table. When ripping on a table saw, the wood is guided along the rip fence and pushed straight into the spinning blade. The blade cuts the wood lengthwise along the grain. The fence keeps the cut straight, and the table supports the wood while working.
Table Saw Setup

Proper setup is critical for accurate and safe ripping. A properly calibrated table saw helps to cut accurately and reduces the risk of accidents. Therefore, follow the steps below to set up the table saw correctly:
Choose the right blade:
- When ripping solid wood, choose a rip blade with 24 to 30 teeth to achieve quicker cuts and minimize burning. Use a blade with 60 to 80 teeth (TPI) for plywood or engineered wood to reduce cracking or tearing. Combination blades (40 to 60 teeth) are versatile for various tasks, but their performance may be somewhat lower for specific jobs.
Align the fence:
- To avoid binding or kickback, it’s important to keep the fence parallel to the saw blade. Check this by measuring the distance from the fence to the blade at both the front and back, using a blade tooth that points toward the fence for the most accurate reading. Adjust the fence until both measurements are equal, then firmly lock the fence in place.
Set the blade height:
- Set the blade height so it extends roughly 1/8 inch above the surface of the wood. This limits the amount of exposed blade, which helps reduce the risk of kickback and promotes a cleaner cut. If you’re working with thicker material, consider making several passes to achieve the desired depth (Advanced Techniques).
Don’t have access to a table saw? Learn how to use a circular saw without a table as an effective alternative.
Check miter slots and accessories:
- Make sure the miter slots are free of dust and debris, and check that any jigs or gauges slide smoothly within them. A misaligned or dirty miter slot can compromise the accuracy of precise cuts.
Install safety features:
- Ensure the blade guard, riving knife, and anti-kickback pawls are in place and functioning. These components are important for working safely.
How to Rip Wood with a Table Saw: Step-by-Step Process
Step 1: Prepare Workspace
- Clear the area around your table saw.
- Make sure you have enough room to feed the board in and out.
- Gather safety gear: safety glasses, hearing protection, and a dust mask.
Step 2: Set the Blade Height
- Raise or lower the blade so it’s about 1/8 to 1/4 inch above the top of the wood.
- This height gives a clean cut and reduces the risk of kickback.
Step 3: Select and Set the Fence
- Measure and lock the fence at the width you want to rip.
- Double-check the measurement from the fence to the blade’s teeth.
Step 4: Check the Blade and Fence Alignment
- Use a square or measuring tape to ensure the blade and fence are parallel.
- Misalignment can cause binding, burning, or kickback.
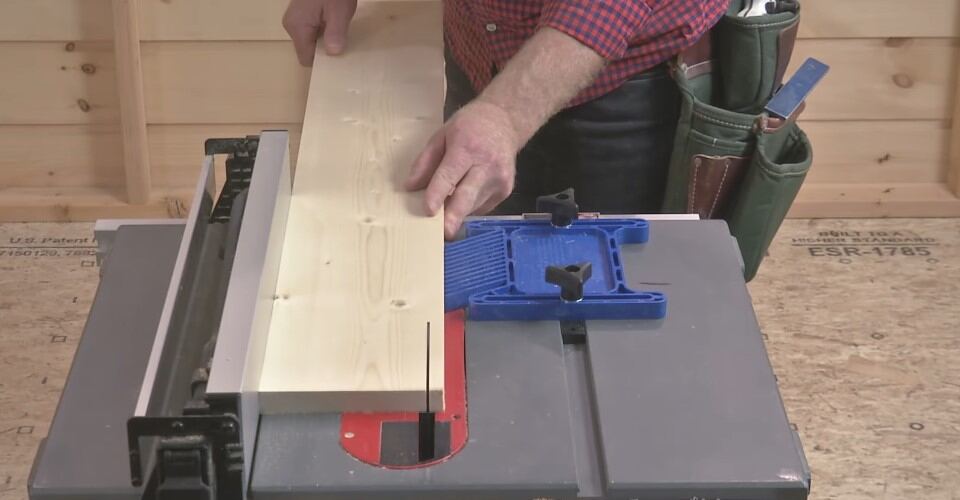
Step 5: Position the Wood
- Place the board flat on the table, tight against the fence.
- Make sure the end is square to the fence for a straight start.
Step 6: Start the Saw
- Stand to the side of the blade, not directly behind it.
- Turn on the saw and let the blade reach full speed.
Step 7: Feed the Wood
- Use both hands to guide the wood, keeping it flat and tight to the fence.
- Use a push stick or push block when your hands get close to the blade (within 6 inches).
- Let the knife work, maneuver the wood steadily at a slow pace, without forcing.
Step 8: Complete the Cut
- Keep pushing the wood past the blade until the entire piece is clear.
- Turn off the saw and wait for the blade to stop before retrieving off-cuts
Step 9: Inspect the Cut
- Check for smoothness and straightness.
- If the cut is rough or burned, see the troubleshooting section below
Selecting the Right Blade for Ripping on a Table Saw
Using the wrong blade can cause the wood to burn, the cut to be rough, or extra pressure to be applied on the motor.
| Blade Type | Best For | Tooth Count |
| Ripping Blade | Solid wood (fast cuts) | 24 to 30 |
| Crosscut Blade | Cutting across grain | 60 to 80 |
| Combination Blade | General use | 40 to 50 |
- Use carbide-tipped blades for durability and cleaner cuts.
- For plywood, use a high-tooth-count blade to reduce splintering.
Safety Tips when Ripping Wood
Safety is important when ripping wood with a table saw. If the spinning blade is not used properly, it can cause serious injuries, and kickback, when the wood suddenly shoots backward, is a major hazard. Below are some important safety measures:
- Wear protective gear: Always wear safety glasses to protect your eyes from dust and debris, use hearing protection to reduce the impact of noise on your ears, and wear a dust mask or respirator to prevent dust from entering your lungs, since it can cause respiratory problems.
- Use push sticks and featherboards: Push sticks keep your hands away from the blade, especially when ripping narrow pieces. Using a featherboard helps maintain steady pressure against the fence, which improves control and decreases kickback risk.
- Stand to the side: To avoid injury from kickback, do not stand directly behind the blade; position yourself to the left or right side of the blade.
- Prevent kickback: Kickback occurs when the wood pinches the blade or lifts off the table, causing it to be thrown back. Use a riving knife or splitter (standard on most modern table saws) to keep the cut open and protect against pressure. Ensure the wood stays flat against the table and fence.
- Keep the workspace clear: Remove unnecessary items, equipment, and cut-off scraps from the table saw’s surface and surrounding area to avoid distractions.
- Unplug during adjustments: Always unplug the saw when changing blades, adjusting the fence, or performing maintenance to prevent accidental starts.
Ripping Solid Wood vs. Plywood
| Feature | Solid Wood | Plywood |
| Blade Type | Ripping blade (24 to 30 teeth) | No grain, but has a face veneer |
| Grain Direction | Must follow grain | No grain but has face veneer |
| Tear-Out Risk | Low (with sharp blade) | No grain, but has a face veneer |
| Support Needed | Outfeed table | No grain but has a face veneer |
How to avoid a common issue
- Board deflection: If the board bows away from the fence, it can cause inaccurate cuts or kickback. Ensure the fence is parallel to the blade and the board is flat. Use a featherboard to maintain pressure against the fence. If the board is warped, joint one edge first.
- Burn marks: This problem occurs when the blade is not spinning well or is spinning slowly, or when you are pushing the wood slowly toward the blade. Therefore, sharpen or replace the blade, and maintain a steady, medium speed. Also, check for resin buildup on the blade, as it can increase friction.
- Inaccurate cuts: If cuts aren’t straight, verify fence alignment and ensure consistent pressure against the fence. A dull blade or improper blade height can also cause drift.
- Kickback: This often happens when the wood pinches the blade or lifts off the table. Therefore, use a riving knife and ensure the fence is parallel to the blade and the wood is lying flat. If kickback begins, immediately turn off the saw and remove the board.
Maintenance and Blade Care
- Clean regularly: After each use, clean the table, blade, and saw of sawdust and dirt. If sawdust accumulates, it can affect cutting accuracy and cause pressure or jamming issues with the blade.
- Check alignment: Regularly check that the fence, blade, and miter slots are properly aligned. Misalignment can compromise cutting accuracy or cause kickback.
- Sharpen or replace blades: Dull blades cause rough cuts, burning, and increased kickback risk. That’s why regularly sharpen the blade or replace it when it becomes worn..
- Lubricate moving parts: For smooth work, apply lubricant to the arbor, trunnions, and other moving parts. Check your saw’s instruction manual to verify the appropriate lubricant to use.
- Inspect safety features: Ensure the blade guard, riving knife, and anti-kickback pawls are in good condition and properly installed
Misconceptions About Ripping
Myth: Any blade can rip wood
-Ripping blades are specifically designed for cutting along the grain.
Small off-cuts are safe.
– Small remnants near the blade can be dangerous, so always wait until the blade completely stops.
Myth: Ripping warped wood is fine.
– To avoid kickback or getting stuck, only rip using a straight and flat board.
FAQs:
How is wood cut when ripping with a table saw?
The wood is pushed lengthwise along the grain toward the spinning circular blade, which is guided by the fence to ensure a straight cut.
What’s the difference between ripping and crosscutting?
1. Ripping = cutting along the grain (lengthwise).
2. Crosscutting = across the grain (widthwise).
Can I rip plywood on a table saw?
Yes! Just use a fine-toothed blade and provide proper support to prevent tearing.
How do I avoid burning the wood?
Use a sharp blade, feed at a steady pace, and ensure proper alignment.
Is it safe to rip narrow strips?
Yes, if you use push sticks, featherboards, or a thin-rip jig.
What is a rip cut in woodworking?
A rip cut means cutting wood parallel to the grain, usually done with a table saw.
How to rip wood on a table saw safely?
Always wear protective gear, use push sticks or featherboards, keep your hands away from the blade, and stand slightly to the side to avoid kickback.
How is wood cut when ripping with a table saw NCCER?
According to NCCER, ripping wood on a table saw means feeding the board through the blade with the rip fence guiding it for a clean, straight cut.
Final Thoughts
Ripping wood on a table saw is one of the most common tasks in woodworking. Whether you’re resizing lumber, making custom boards, or preparing material for furniture, knowing how wood is cut when ripping with a table saw gives you cleaner, safer, and more professional results.
By selecting the right blade, learning how to use the rip fence correctly, and following safety rules, you can work better and stay safe while using the table saw.
For larger projects, a budget-friendly table saw might be a better choice. we’ve reviewed the Best Table Saws Under $500.

Welcome to Homenias, I’m Jaman M, and I’m here to help you discover the best home products. With years of experience, they offer genuine reviews and helpful guides. Their mission is to make your choices easier. It’s organizing your space or finding creative solutions. Explore how the right products can enhance your everyday life. Don’t miss out on finding the best home products to raise your living experience.